


This template is also available that feature attractive, slider menu. Silder menu is interesting enough to be placed under the header. Besides attractive because of its dynamic, the menu is quite effective slider invite blog visitors to see and click on your post put the slider in the menu.
There are some changes that I do in this menu, other than background color, writing models, and the color of the writing, I also change the time interval (delay) between the post. I put the menu is the top slider template, exactly below the header.
To edit the contents of this slider menu, please follow the instructions below :
- In the Page Elements, see the following gadgets :

-
Click on the gadget, then click the HTML / Javascript.
- Enter the following code into the box provided :
<!-- Casing -->
<div id="casing">
<!-- Slider -->
<div id="slider">
<div id="mover">
<div class="slide">
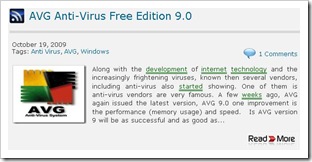
<h2><a href="http://soft-template.blogspot.com/2009/11/read-more.html"> Auto Read More</a></h2> <p>As we know, bloggers have support read more. But still we have to divide the posts that will appear first and which will appear whole. Read more automatic advantage is you no longer need to manually divide the posts read more will work automatically according to the sentence fragment height, which we previously had on the Edit HTML settings. And...</p> <img alt="" width="130px" src="http://lh3.ggpht.com/_wyuKzbY9B1A/SuQOiU0tPgI/AAAAAAAAAcQ/rgnL0rj74BE/read%20more_thumb%5B3%5D.jpg?imgmax=800" height="80px"/>
</div>
<div class="slide">
<h2><a href="http://soft-template.blogspot.com/2009/11/avatar-mybloglog.html"> Avatar Mybloglog</a></h2> <p>Avatar mybloglog is the face profile image visitors who commented on our blog. And visitors who make comments are member of mybloglog, a social bookmarking site that is very popular. I have provided avatar mybloglog widget on this template, but if you are interested to put it on your other blog, I'll give you a guide below. On the Edit HTML...</p> <img alt="" width="130px" src="http://lh5.ggpht.com/_wyuKzbY9B1A/SuM0KGoRERI/AAAAAAAAAas/nbLA8Za-l8E/Sasha%20jadi%20artis2_thumb%5B6%5D.jpg?imgmax=800" height="80px"/>
</div>
<div class="slide">
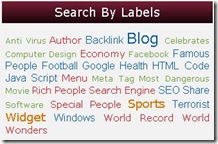
<h2><a href="http://soft-template.blogspot.com/2009/11/label-cloud-modification.html"> Label Cloud Modification</a></h2> <p>Label cloud is a label or category that looks like a cloud. Actually, bloggers are provide labels cloud, but the label cloud from this blogger just by writing just one color. Label cloud that we will modify is how to make the writing colorful large and small as writing. In this template I have put a label cloud modification, but if you want to place...</p> <img alt="" width="130px" src="http://lh4.ggpht.com/_wyuKzbY9B1A/SuQGJwiUzVI/AAAAAAAAAcI/noM9V2VIK1A/label_thumb%5B8%5D.jpg?imgmax=800" height="80px"/>
</div>
<div class="slide">
<h2><a href="http://soft-template.blogspot.com/2009/11/related-posts.html"> Related Posts</a></h2> <p>Related Posts are posts which are in a label or category. Using the related posts to facilitate visitors to see what articles are in a label with other articles, and will most likely be in the clicks by visitors, because it was right under our posts. Actually, I've put the code related posts on this template, but if you want to put this code in...</p> <img alt="" width="130px" src="http://lh6.ggpht.com/_wyuKzbY9B1A/SuP_GmO4XDI/AAAAAAAAAcA/MDwK16GZT-s/related_posts_widget_thumb%5B2%5D.png?imgmax=800" height="80px"/>
</div>
</div>
<!-- /Mover -->
</div>
<!-- /Slider -->
</div>
<div class="clear"/></div> - Replace all the code that I give color to your code, then click Save.

Sections must be changed:
Good Luck !Blue color --------> url address of the posting
Green color --------> the contents of the postings to be displayed
Red color --------> url address of the image
Font bold --------> post title


